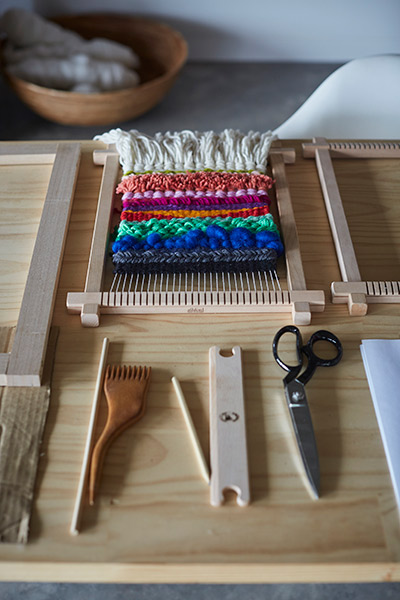
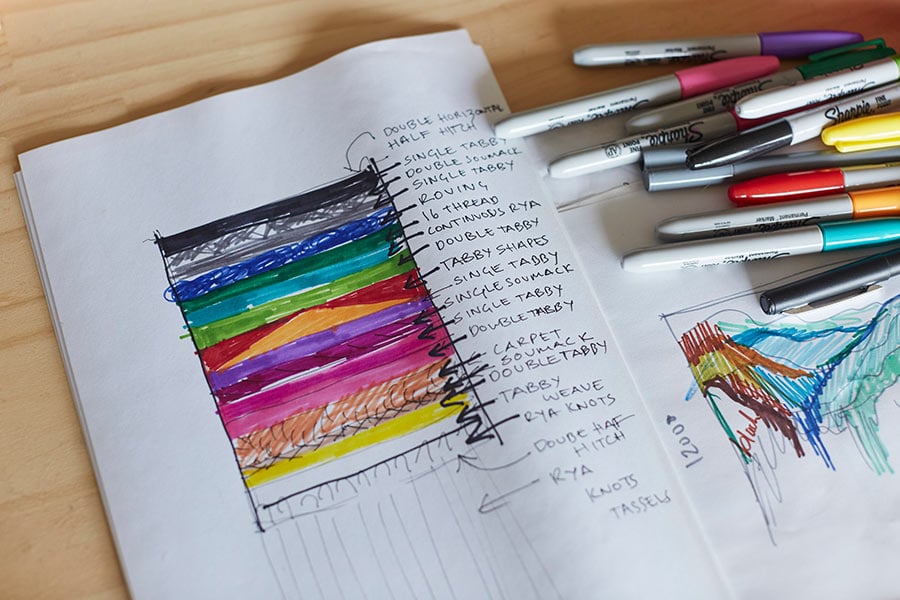
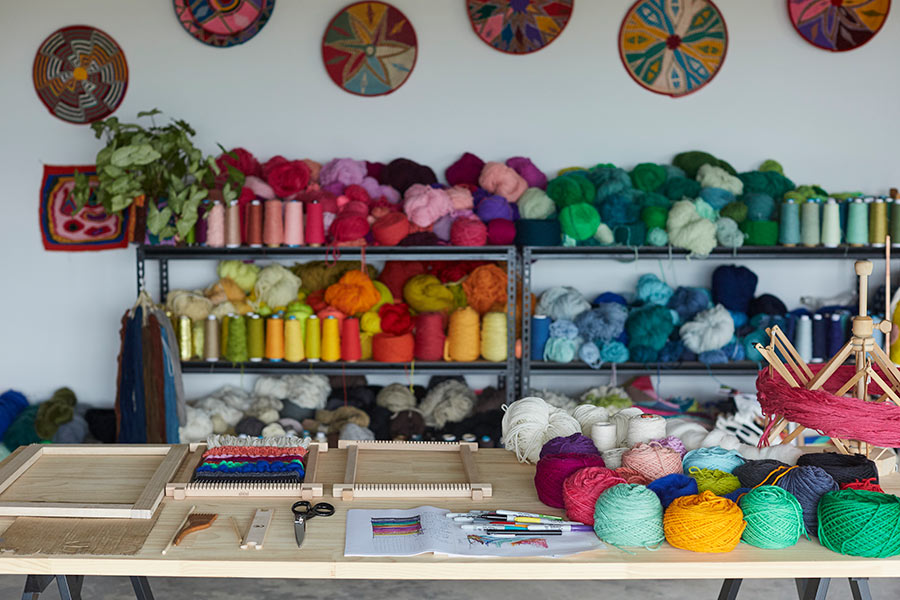
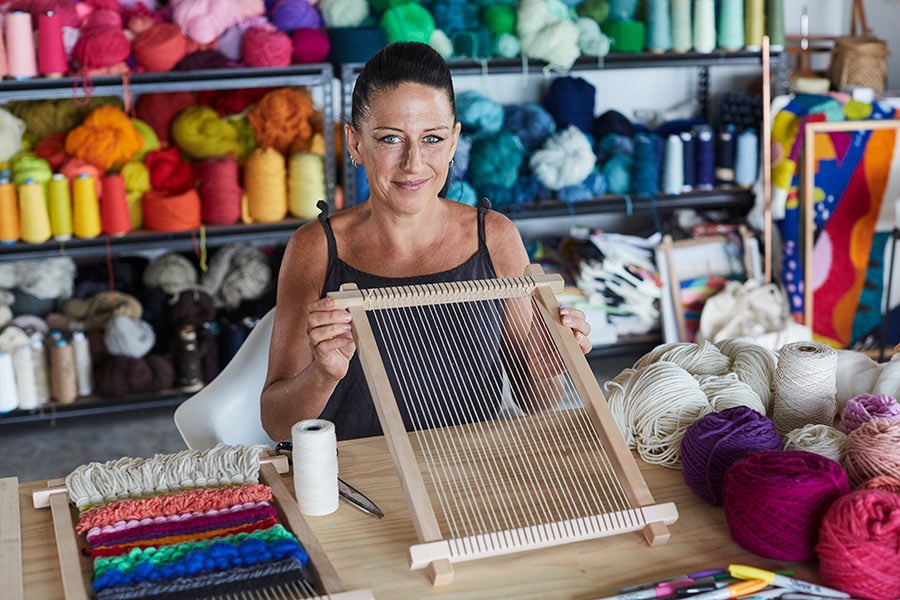
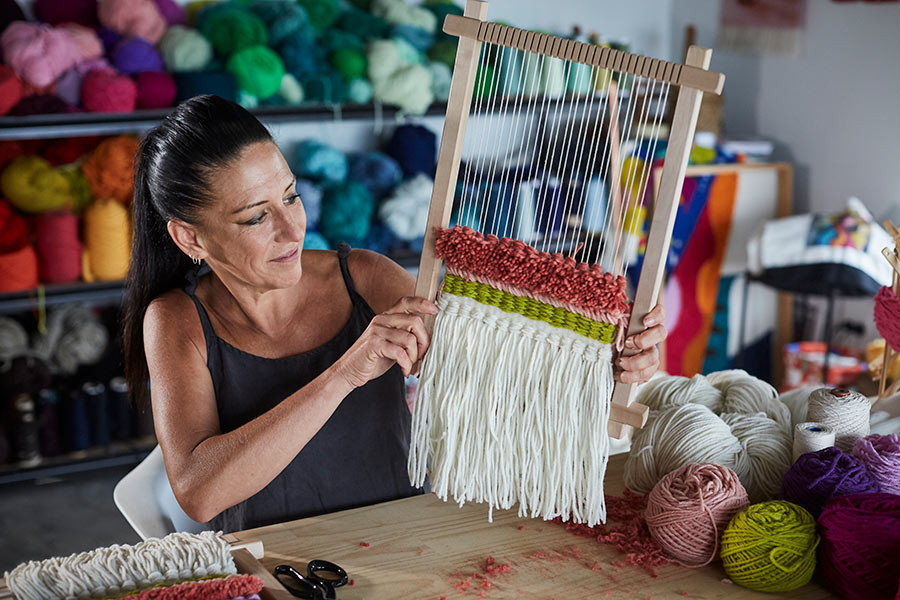
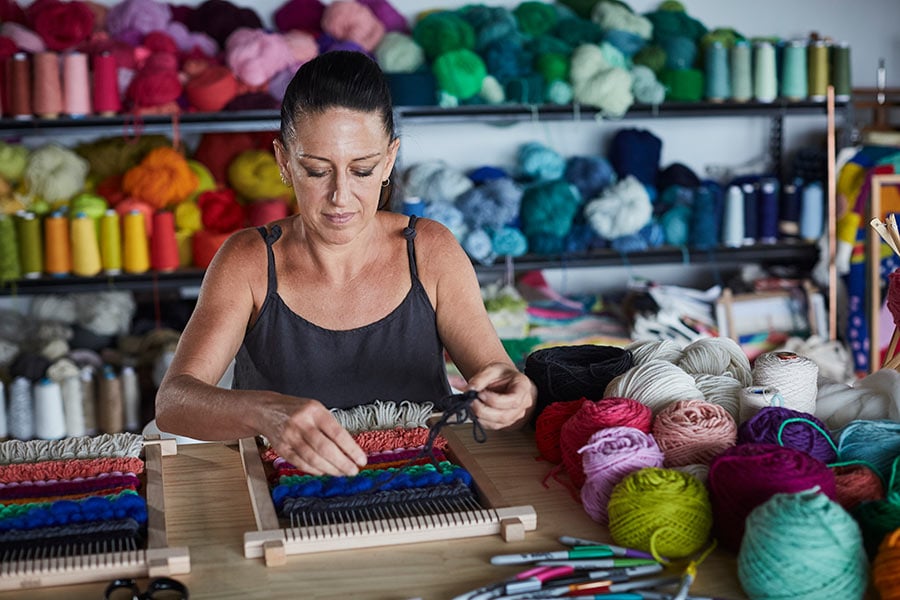
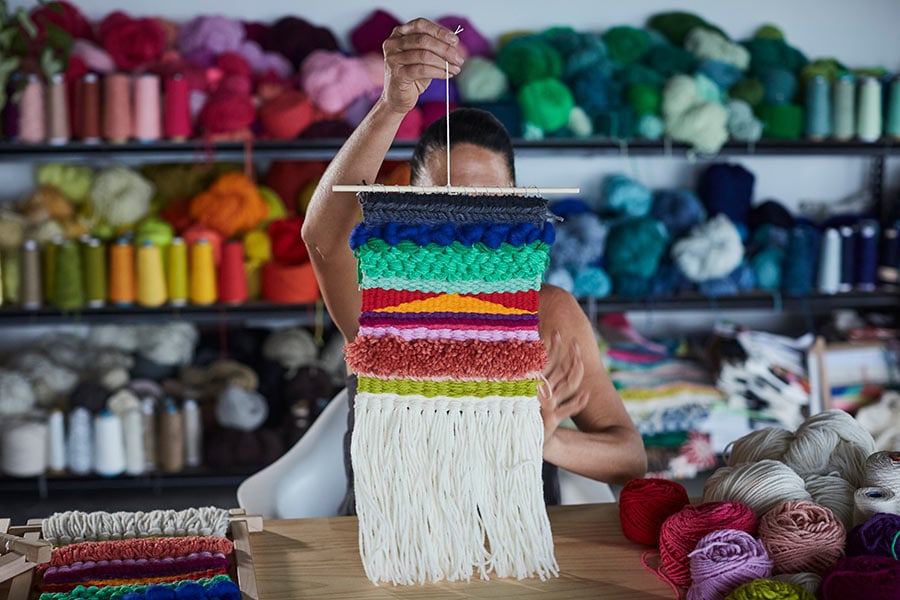
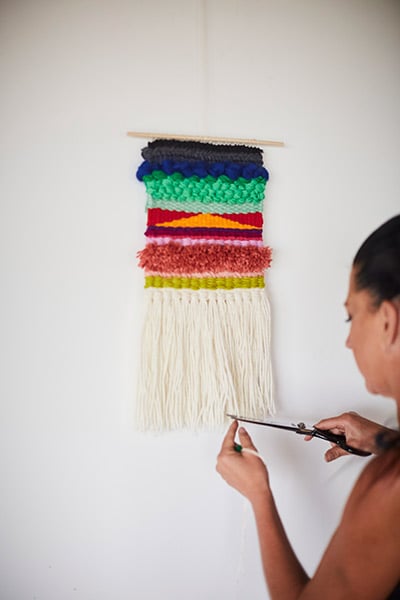
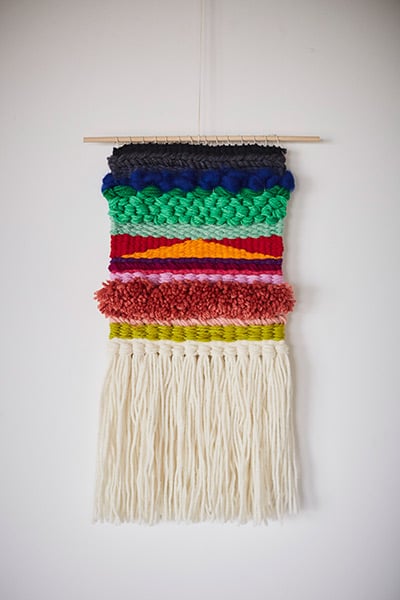
This woven wool wall hanging is accomplished on a simple loom which will hold the cotton warp as the wool weft is passed in and out with the fingers. Australian artist Natalie Miller’s tutorial will arm you with an array of different techniques that you can achieve with tapestry weaving. You can follow the design and colour palette or create your own!

WHAT YOU NEED
- Loom – ready-made or you can make your own from wood or cardboard following these instructions. This tutorial is based on a frame that is 30x45cm, and you will need to adjust your wool lengths accordingly.
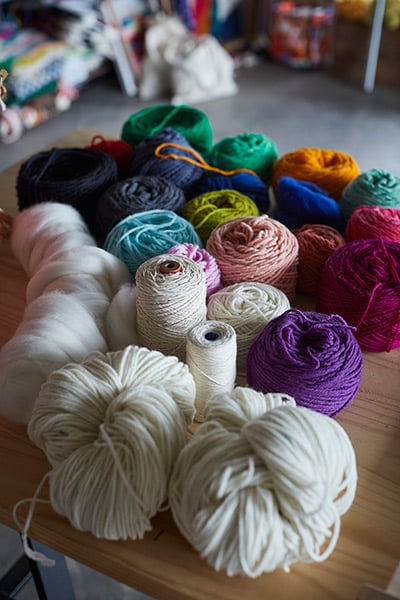
- Warp – strong cotton tapestry warp or twine.
- Weft – wool fibres. This tutorial uses 12ply throughout.
- Scissors.
GLOSSARY
- Warp: The vertical or longitudinal warp yarns are held stationary in tension on the frame or loom.
- Weft: The transverse weft yarn is drawn through horizontally and inserted over-and-under the warp.

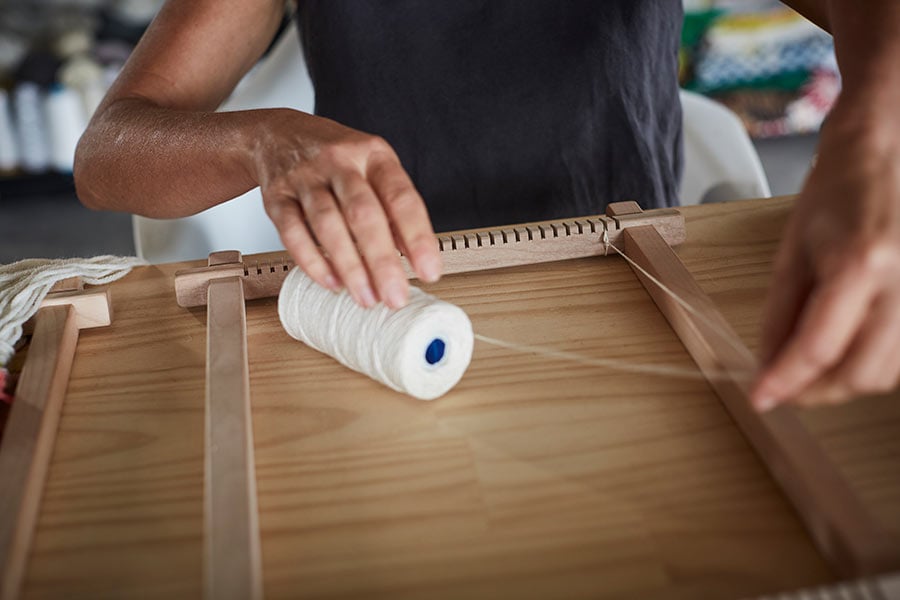
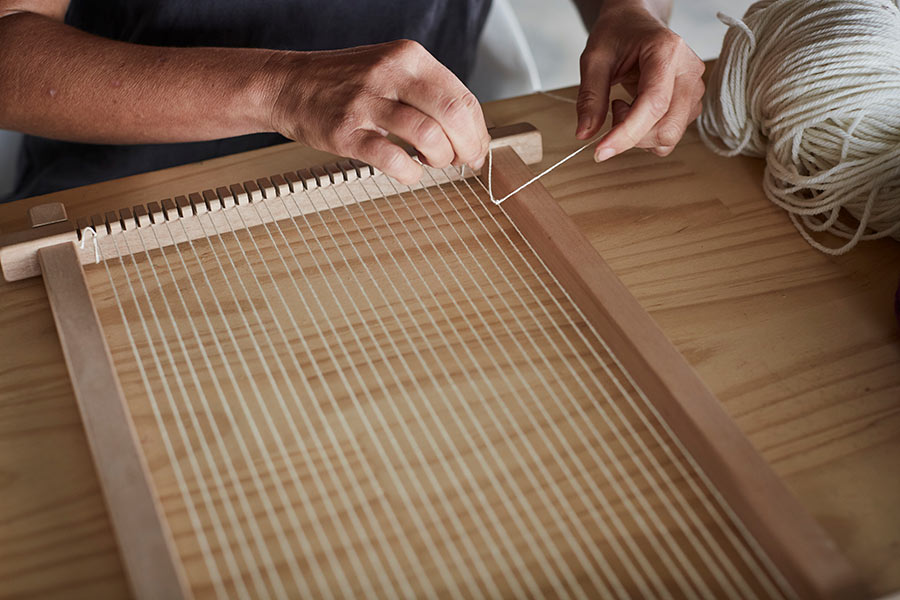
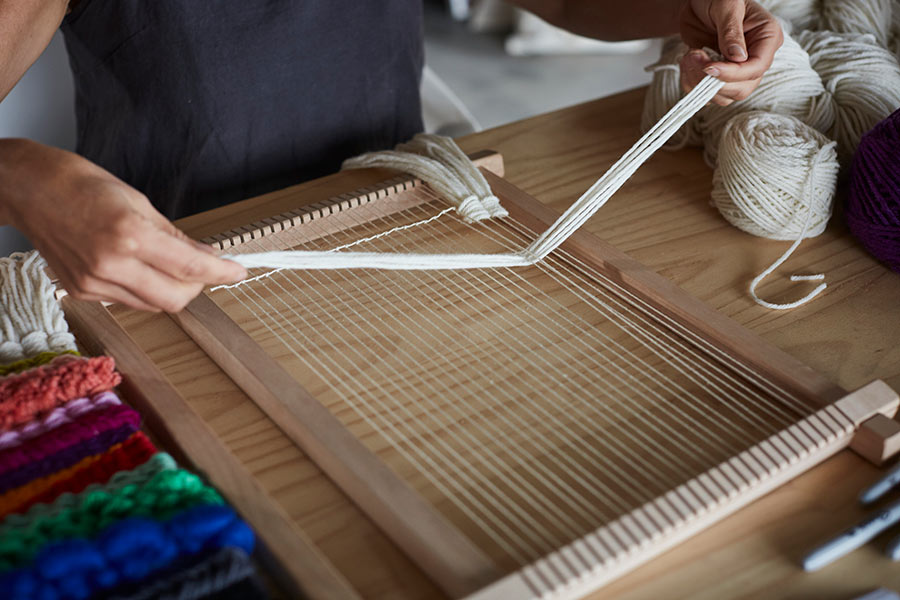
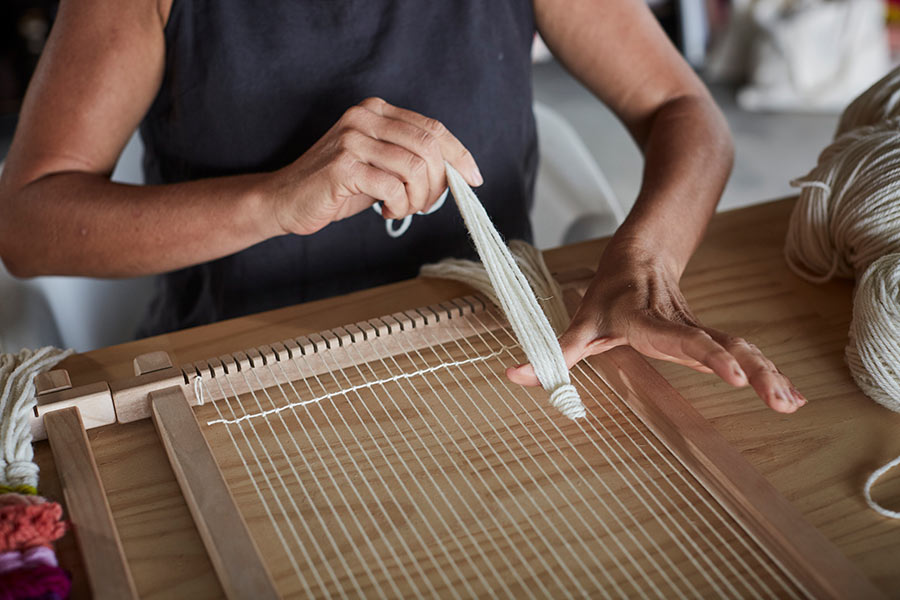
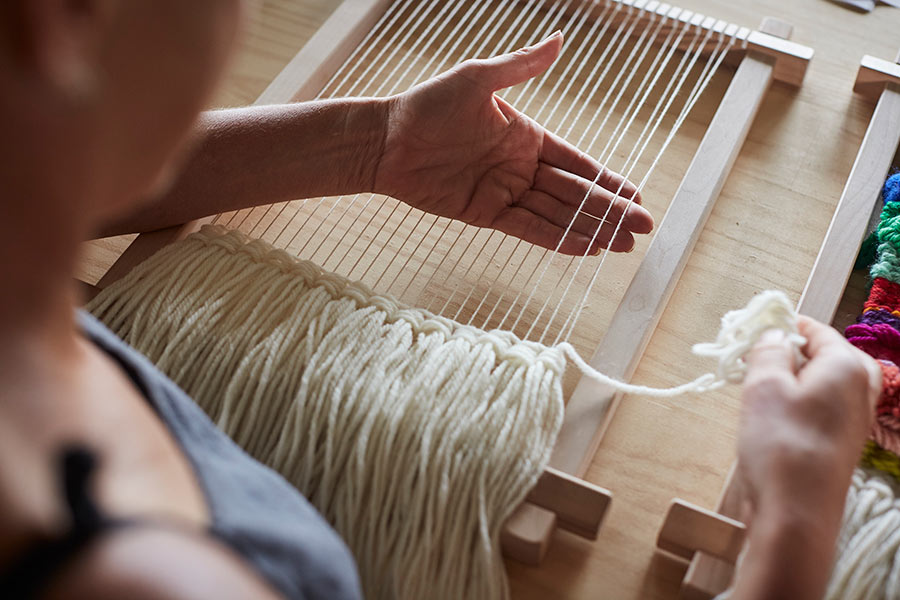
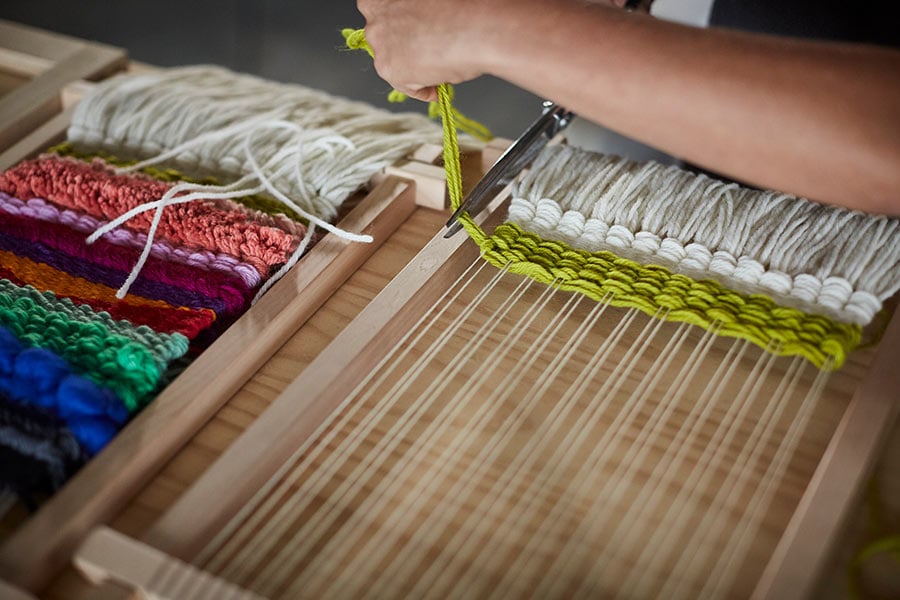
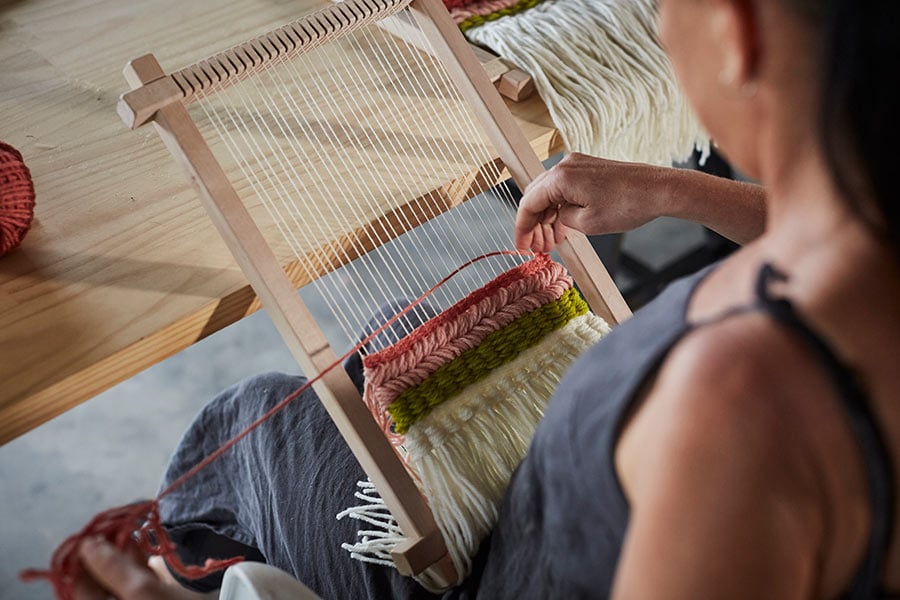
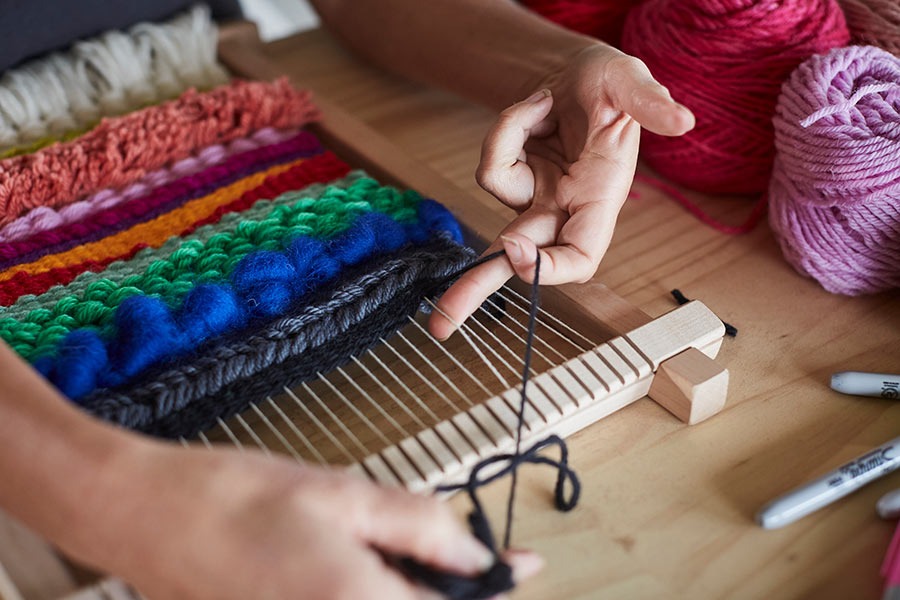
STEP 1: WARPING THE LOOM
Warping the loom is when you wrap the warp around the loom. If you are using a ready-made loom you wrap the warp or refer to the manufacturer’s instructions.
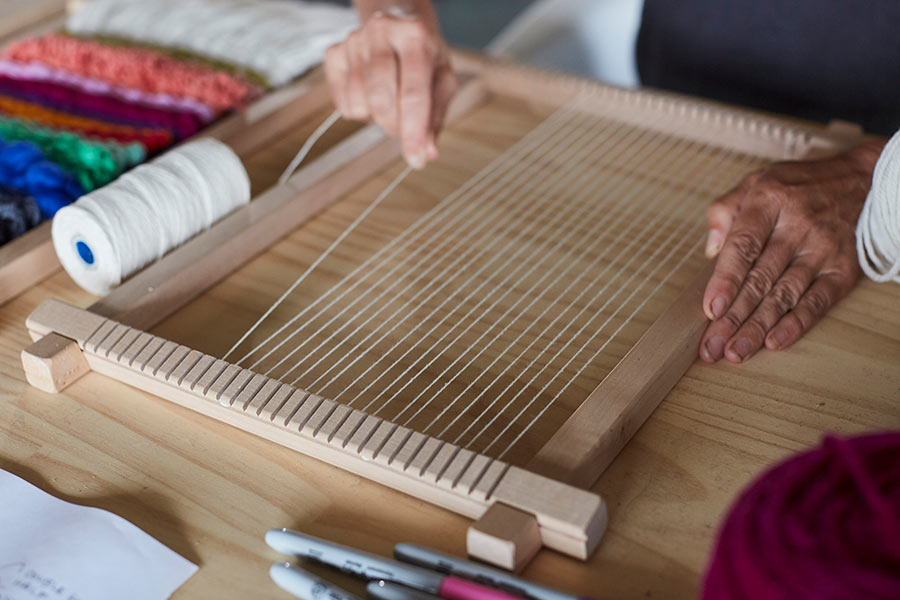
Start by laying the loom on the table. Tie the end of the cotton warp to the bottom bar of the loom to secure the thread to one end of the frame. Continue to wrap the warp up, around the notches, or 15mm marking if making your own loom, and down on the loom until you have the desired width of your tapestry. Retain the same tension throughout the warped loom. The surface should feel tight, almost like guitar strings. If it is loose, go back and tighten your warp.
Once you have warped up the loom, tie a knot on the same side of the frame that you started with to secure the warp then cut the thread to allow a 2cm tail.

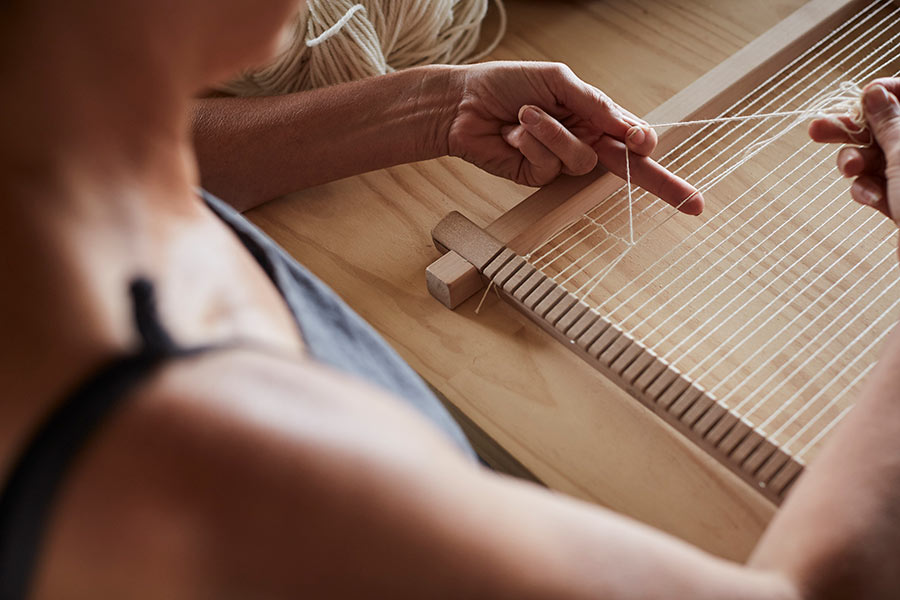
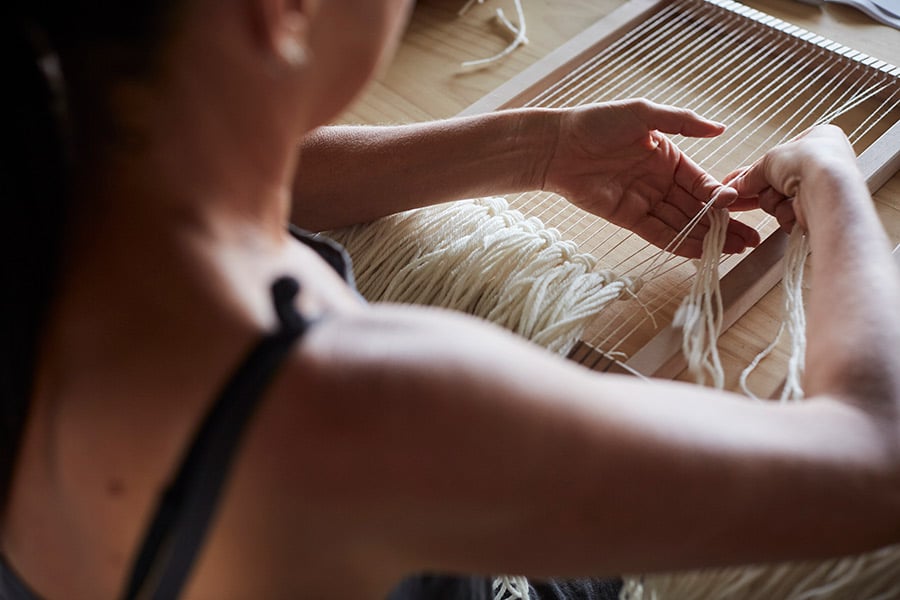
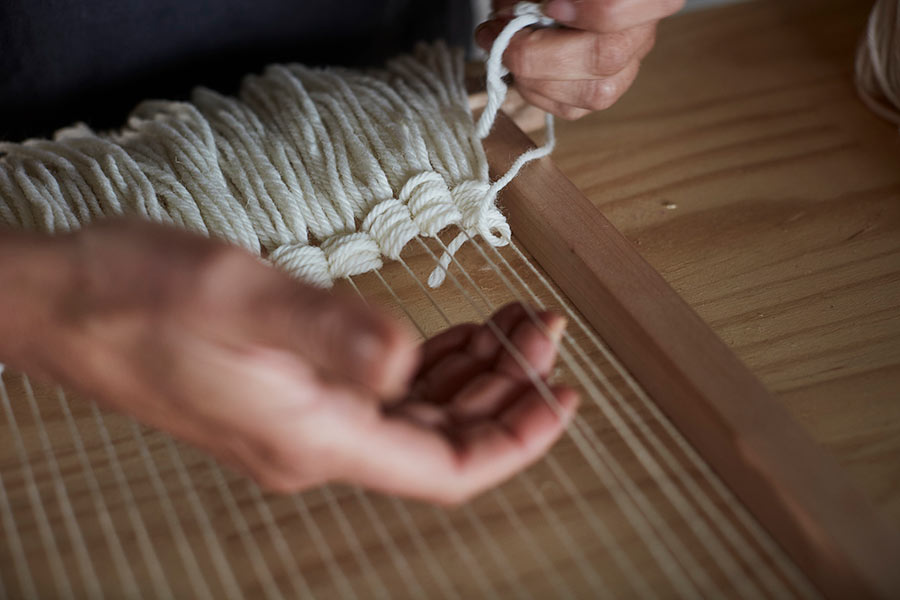
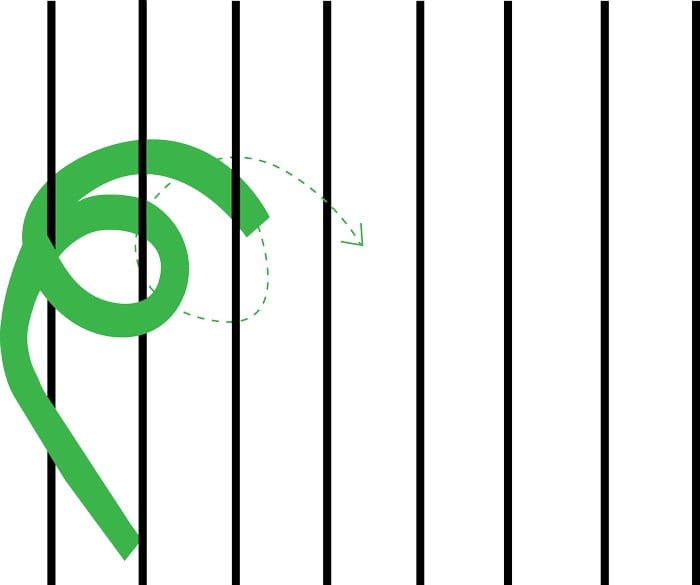
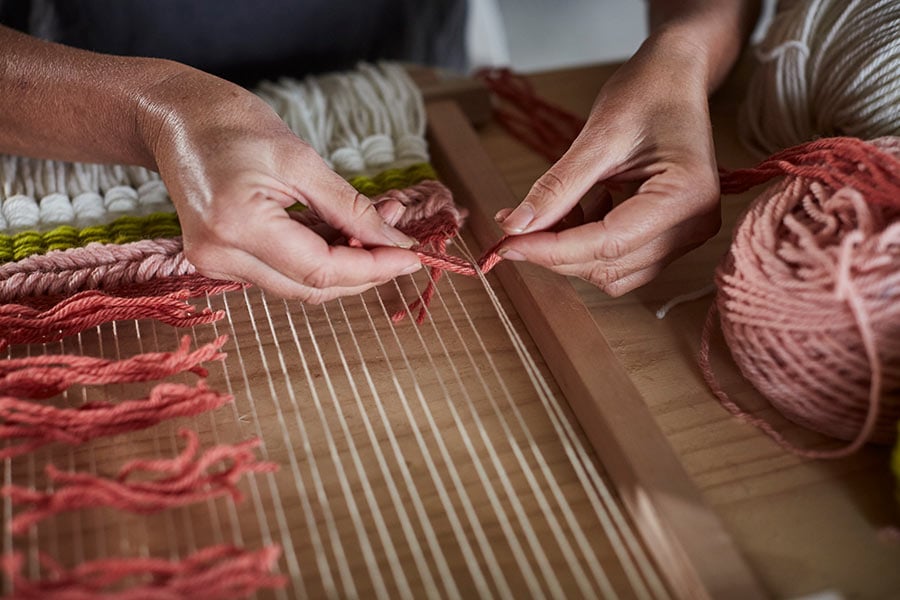
STEP 2: KNOTTING THE BASE - HALF HITCH KNOT
One of the most important processes of weaving is to create a row of horizontal half hitch knots along the bottom of your weave so that it will keep your weave in position when weaving and keep your weft in position when you cut the tapestry weave from the loom. This process is also done at the top of your weave once you have completed your weave.
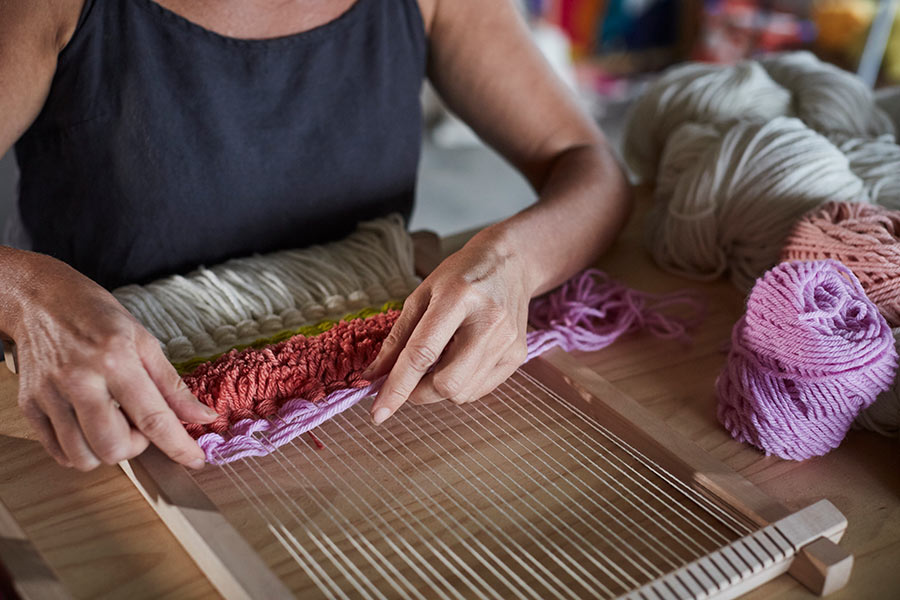
To make a half hitch knot you pick up the warp with your middle finger and your pointer finger acts like a hook. Hook the length of yarn around this finger and create a triangle. Bring the yarn over the top of the warp and then under so that it comes up through the triangle you have created. The first one is a loop; you need to do this action twice on the same warp to create the knot. The trick to this knot is not pulling too tight so that the warps come together.
Take a length of your cotton warp three times the width of your desired tapestry. Start on the first warp on your left and tie a double knot at least 5cm up on the first warp. Continue to tie two horizontal half hitch knots on each warp, ensuring the knots continue in a straight line. You will cut the end once you have completed a full row of knots.
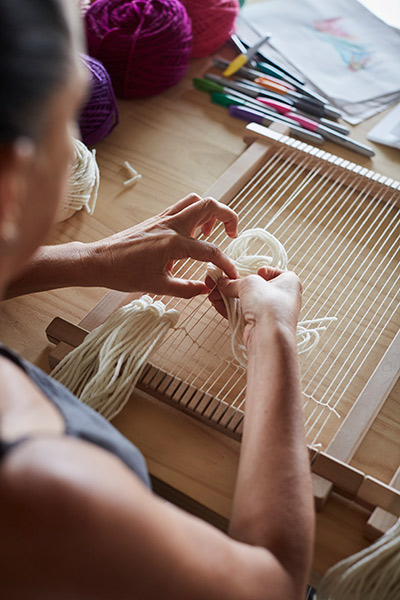
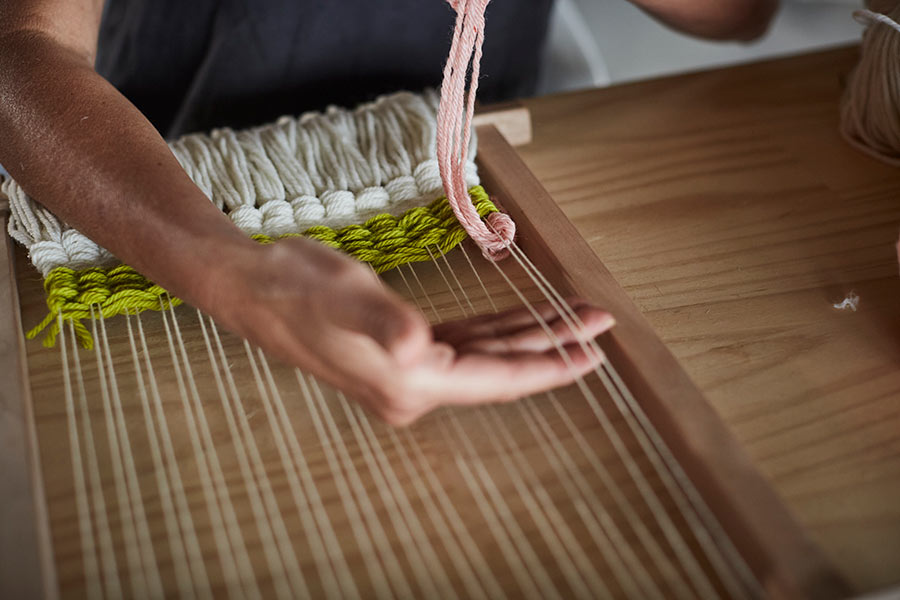
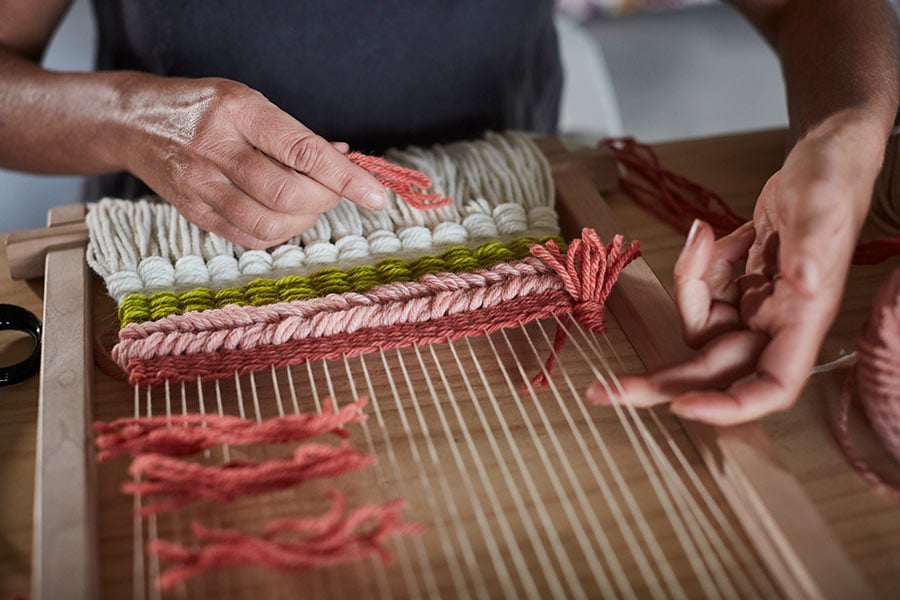
STEP 3: KNOTTING A ROW OF RYA KNOTS
RYA knots can be added at the bottom of the weave before tabby weaving to create a tasselled fringe, or can also be used throughout the weave for a tufted carpet effect.
To create the fringed effect, you need to work out your desired length of fringe and double the length. We will get six lengths of 60cm. The amount of lengths does depend on the thickness of your yarn, so if you are using thin wool you would have more lengths for each tassel.
Now bring the lengths together and pass both lengths together behind the warps and bring the ends through the centre underneath the head of the knot. Carefully pull into position.
To create the next RYA knot you pick up the adjoining two warps make a RYA knot on these warps. Continue this all the way along the bottom of your weave. You can then give your tassels a trim with scissors, perhaps in a straight line or even in an arrow form.
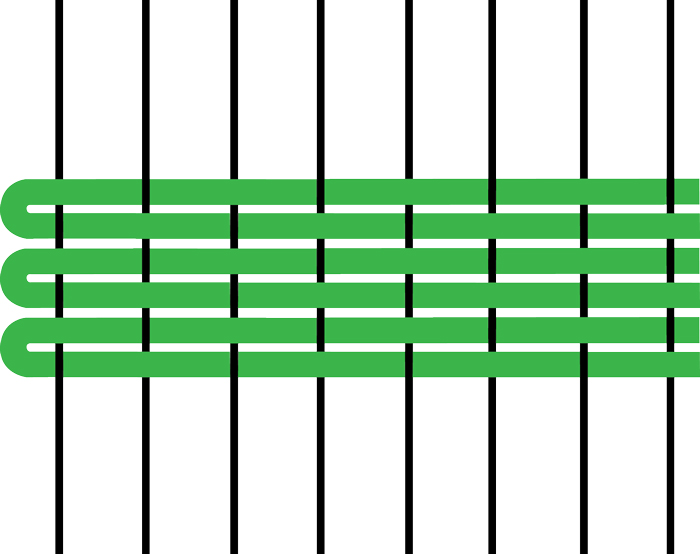
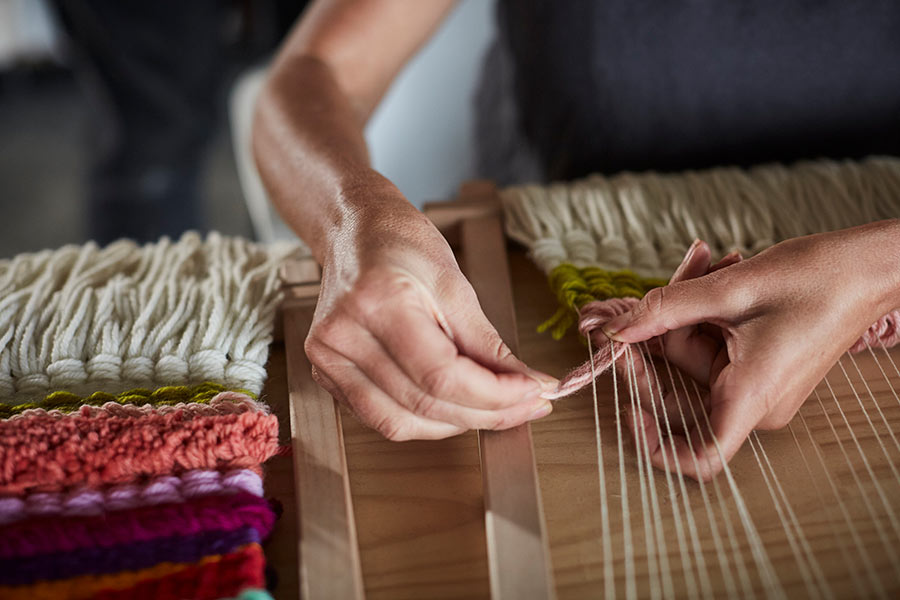
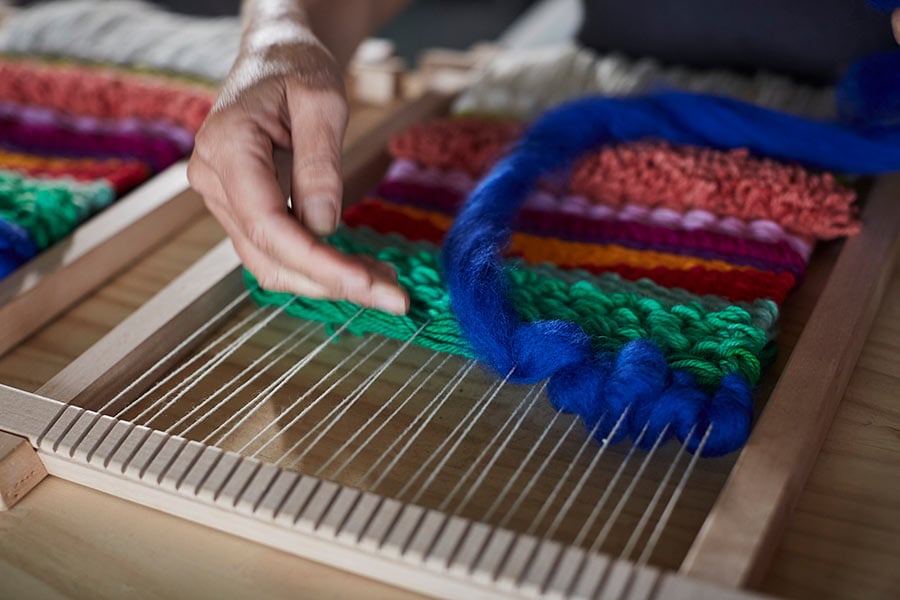
STEP 4: TABBY WEAVING
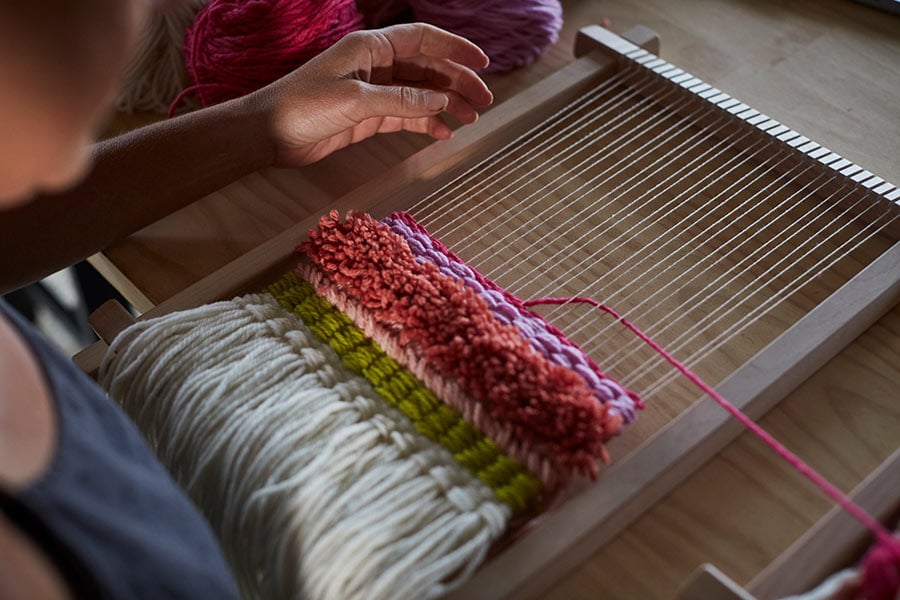
Now that you have created a row of RYA knots we will now do rows of tabby weaving, a form of plain weaving in a basic under-over pattern.
To start the first row of weaving, take a length of around 3 metres of yarn and roll in a manageable ball of create a yarn butterfly. We will be just using a single strand of 12ply wool. You will then hitch on (a half hitch). This will hide the tail of your yarn.

With your fingers, pick up every second warp and feed the weft under. Preferably pick up 2-4 warps at a time. When placing in the weft threads, make a small sunrise with the yarn across the row and push the threads down with your fingers. It is important to leave your weft quite loose so that you don’t weave too tight, as that will force the edges to come in; the yarn should be evenly spread.
As your rows progress you push your weft down so that your warp is not visible. Once you have finished your colour you can hitch off (a half hitch, the same as hitching on, so you are tucking your end in the back). Trim the excess weft to allow at least 3cms at the back.
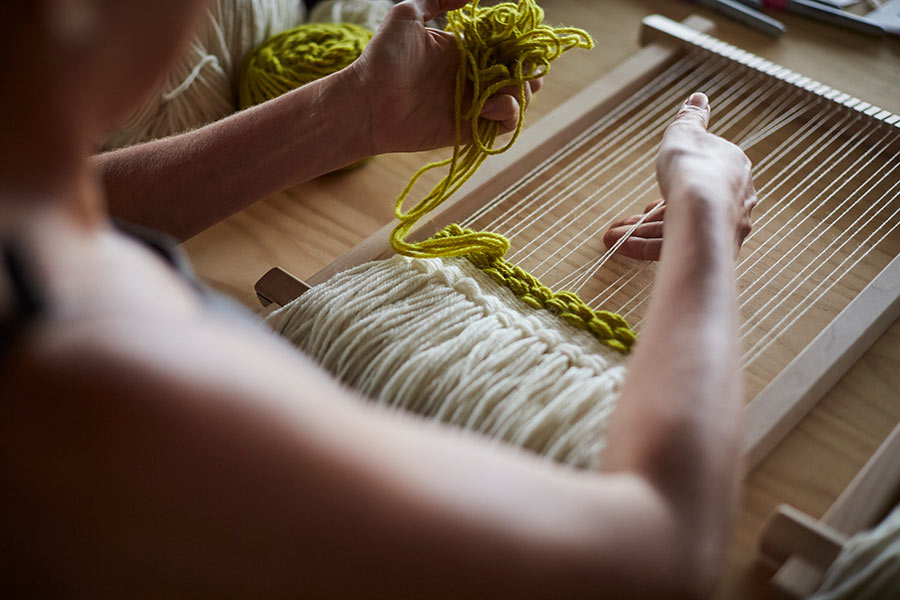
Now we are moving onto our next colour: chartreuse. Again we will take 3 metres in length of wool but use four strands. We will be doing a tabby weave but this time using the four strands going over two warps and under two warps all the way along, and the row above will be the opposite still going under and over two warps at a time. Once you have finished your lengths of yarn, hitch off and cut the end so you have around 3cm to hide at the back.
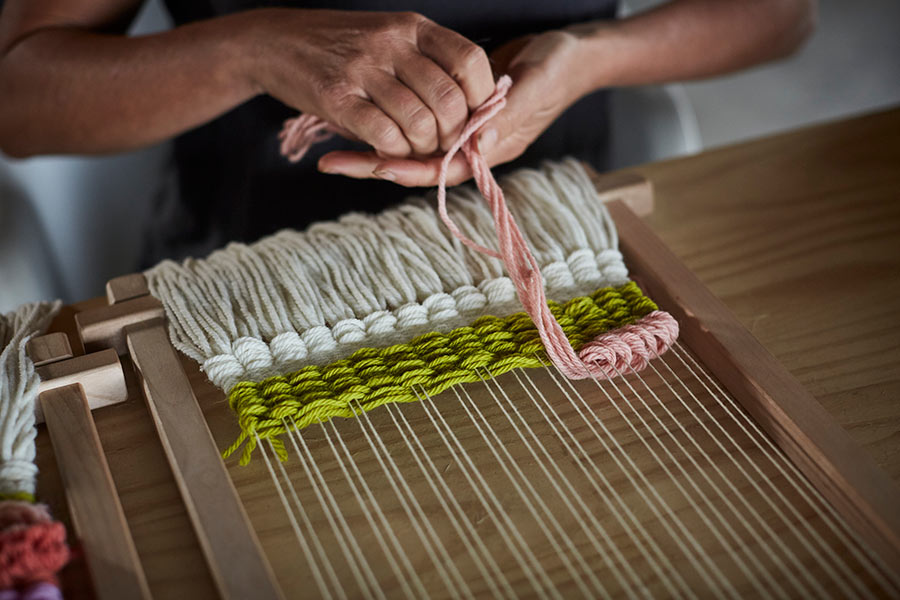
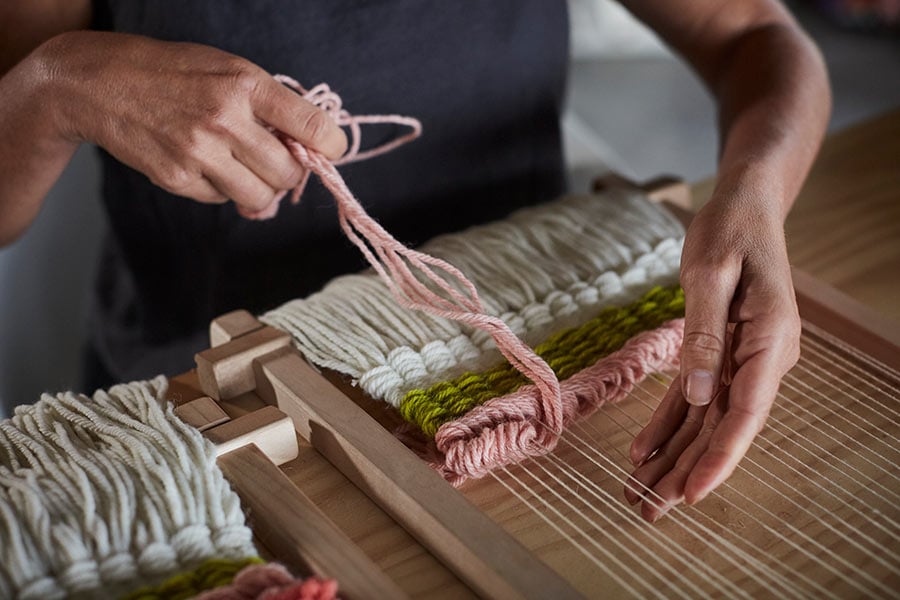
STEP 5: KNOTTING A SOUMAK
A row of Soumak creates a textured knot across the warp. You can also do two rows in opposite directions to create a braided or fishtail effect.
Cut 1.7m length of your pale pink wool and have 6 strands of the same for each row. If you are using thicker wool you will use less strands and more strands for thinner wool.
Take the end of your lengths of wool under the first two warps and hitch on. Put your hand in the gap between the third and the fourth warp and go backwards and pick up three warps. Take your wool back over the top of two warps and bring forward under three warps. Pull your knot into position and try not to pull too tight. Continue this until the end. You will do this over the last two warps and then hitch off by tucking your end to the back.
Anchor the end on the left-hand side with a hitch knot then pass the weft under the second warp. You will then go back over the top of two warps and bring the weft under three warps, making an ‘e’ shape. Continue this all the way to the end not pulling the knots too tights. At the end you will bring the weft back over the last two warps and under the last two warps then you will hitch off.
You can then do the same row of knots directly above, starting from the right-hand side and working in the opposite direction. You will need to cut another 4 lengths of yarn and do the same process yet in the opposite direction. This creates a braid effect when knotting two rows of Soumak in opposite directions.
Once you have completed two rows of Soumak in the opposite direction you can now do rows of single tabby weave to secure the Soumak in position. Ensure you push the weft down tightly with your fingers.
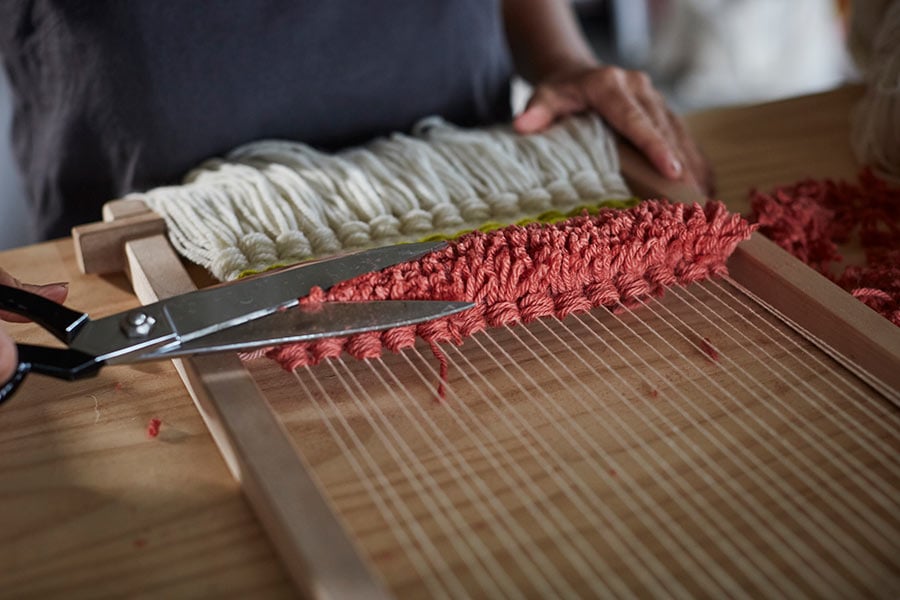
STEP 6: CREATING THE CUT PILE CARPET EFFECT
This is a fun and effective knot that creates fabulous texture.
Cut lengths of around 10cm with six strands of wool. You now are doing mini RYA knots like you did in Step 3. You do this all the along on one row, and on the next row you will be using alternate warps. The third row you will be doing alternate warps again, the same as the first row. Ensure they are tight, and you have compressed them down with your fingers.
Once you have done at least three rows of mini RYA knots you can now cut the ends to create a cut pile carpet effect. Ensure you be careful with the scissors and don’t cut your warp or your fingers.
STEP 7: DOUBLE TABBY WEAVING
Cut 4 strands of 3-metre lengths of pink yarn. Double tabby goes under two warps then over two warps and so on. Don’t pull too tight and always hitch on and off at the beginning and end to hide the tail.
With the bright pink I’ll take 3 metres of the wool and weave single tabby weave until I have finished the length of wool. I’ll then do a single row of Soumak.

STEP 8: SINGLE TABBY WEAVE
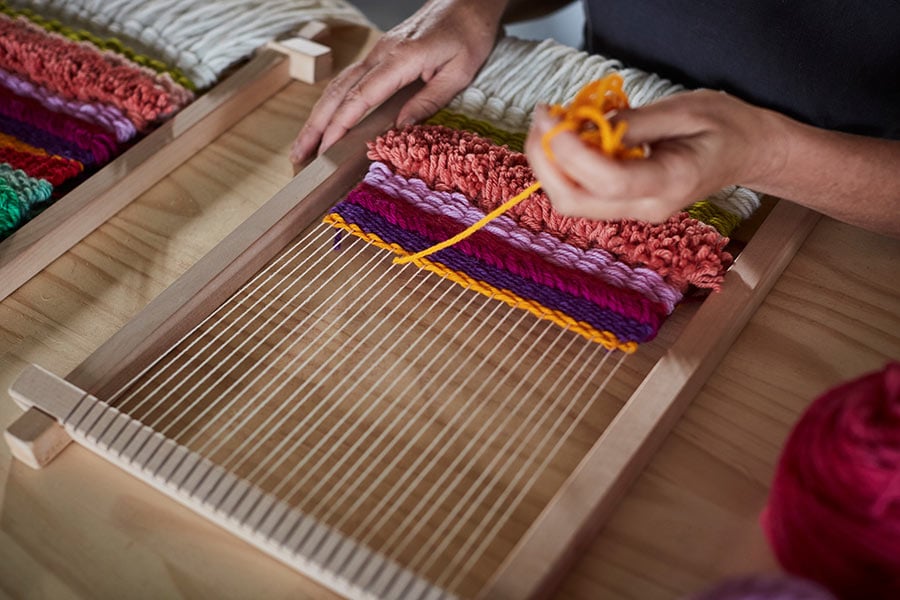
Taking 4 metres of the saffron wool (or colour of your choice) and hitch on, then weave all the way across the row.
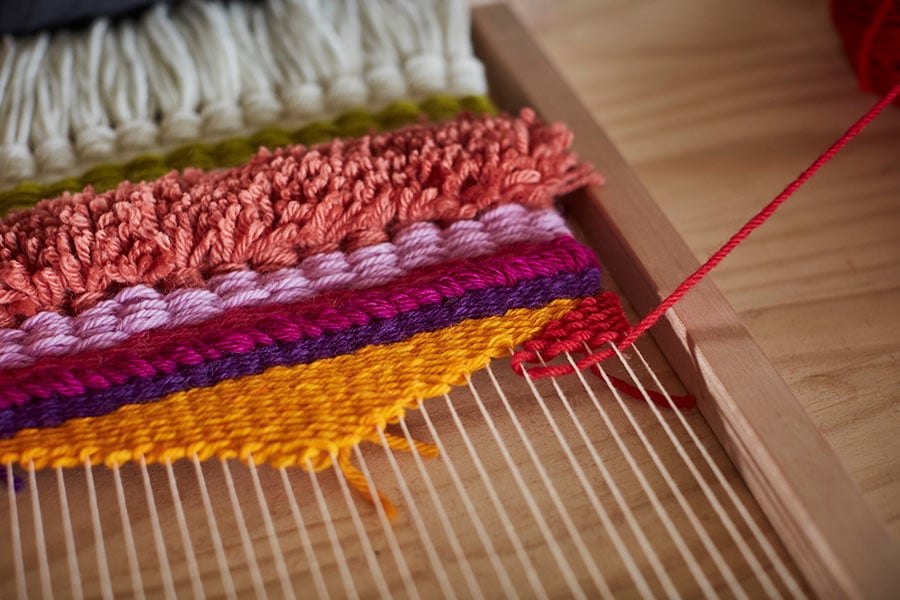
Next, turn back on the row above but drop a warp each side (ie start closer to the middle) on each row until you come to a point and have made a pyramid shape. As there are an even number of warps, our point will be two warps.
Now you will weave in the sides of the triangle. I’m using the red wool. Start at each side and weave with a single tabby weave, but this time you will pick up a warp on each row. Weave the red until you have reached the same row of the point of the triangle. Do the same on the opposite side. As you will weave directly on top of the red and orange you want to ensure that the rows works out as over, under, over, and so on. If one of the red sides is not, then just add an extra row on one side.

STEP 9: SINGLE TABBY WEAVE – CONTINUED
Now with the light mint I’m going to do a single tabby weave but using four strands. Cut 2.5 metres of wool and use 4 strands of that length, beginning by hitching on and weaving over and under, one warp at a time. Once you have finished the length you can hitch off. It creates another beautiful texture the other versions of tabby weave.
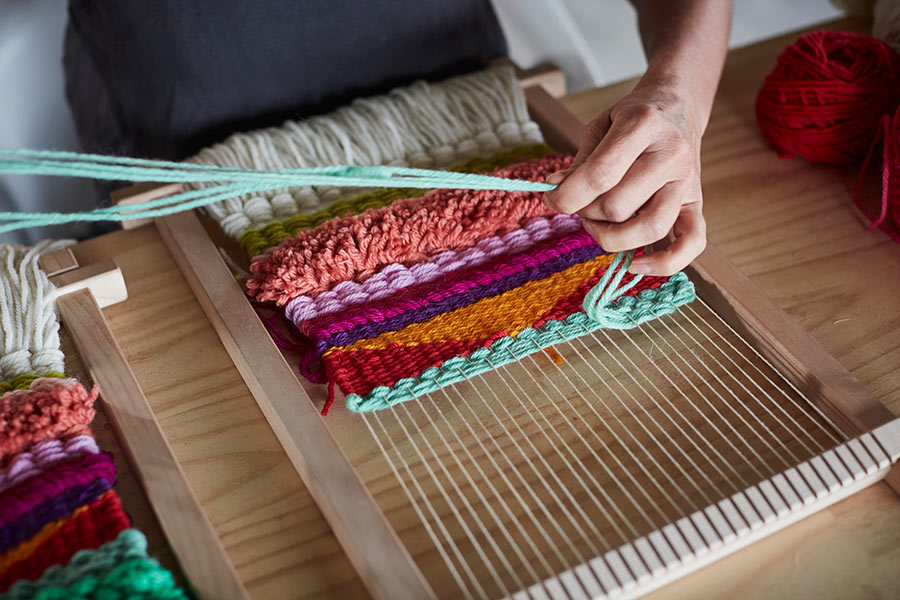
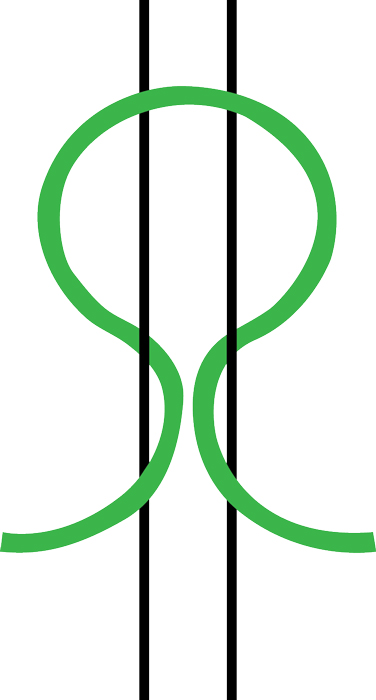
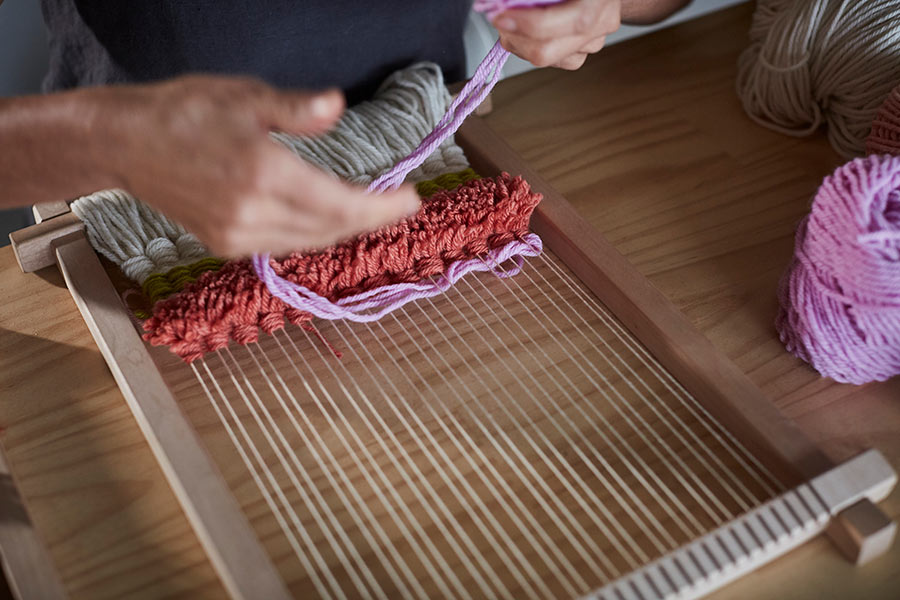
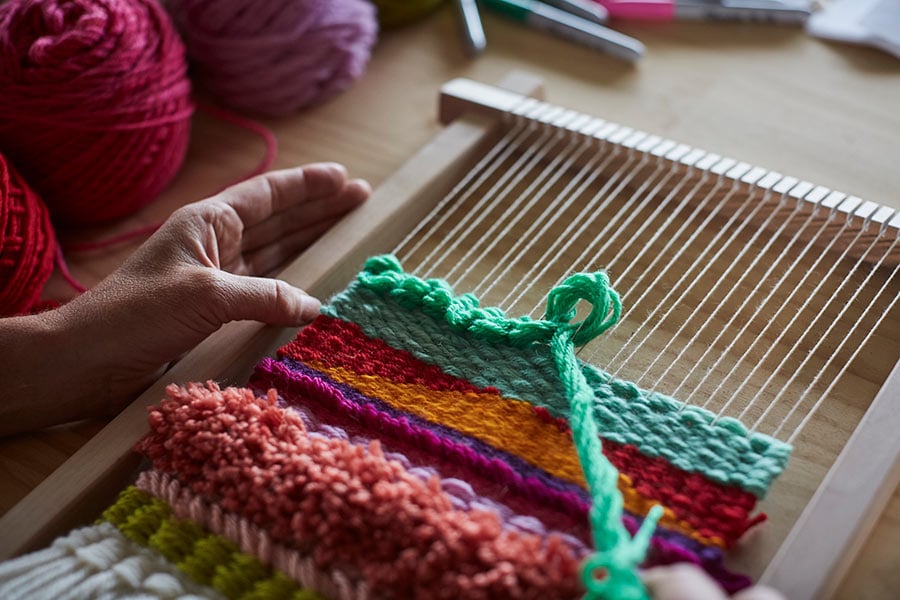
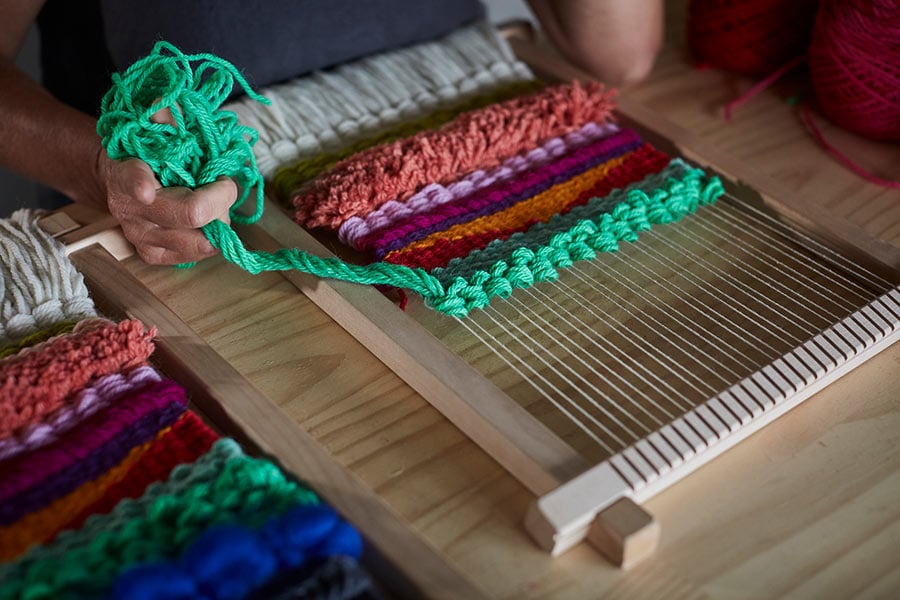
STEP 10: CONTINUOUS RYA KNOT
The continuous RYA knot is a tad tricky however looks fabulous. Using the mint coloured wool, take 3 metre lengths, and six strands. With this knot you will always work with two warps at a time only. Starting with the first two warps on the left-hand side, bring the end from the back to the front. Now you’re going to take the yarn over the top of the left-hand side warp to create a RYA head over the two warps, and then take the yarn to the back on the right-hand side warp. Now bring the yarn back through the centre of the two warps to the front, and move on to the next adjoining two warps.
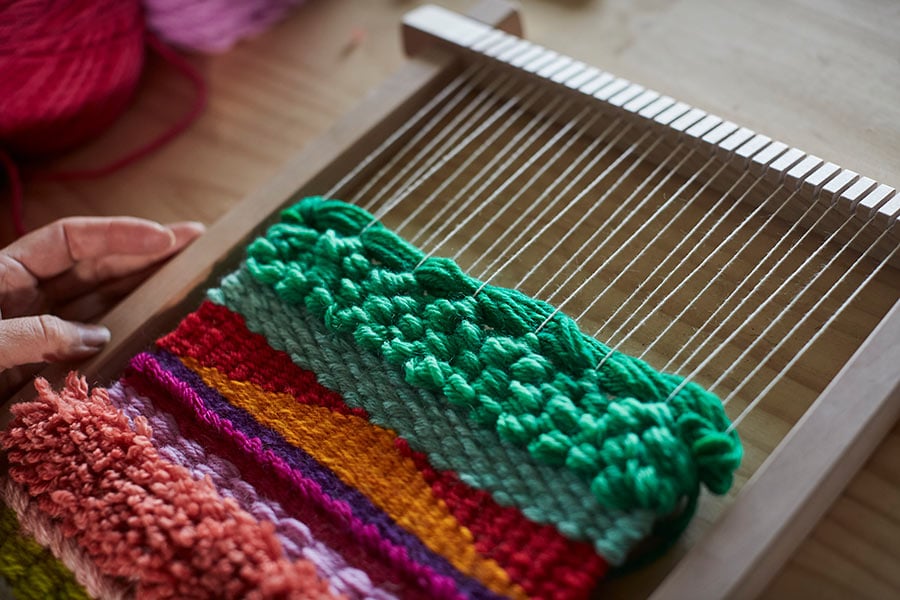
Once you have finished off the first row you can move onto the next. This time you will be using alternate warps from below and going in the opposite direction. So, you will take the yarn through the centre of the second and third warps on the right-hand side from the front to the back and come out on the right-hand side. You create the RYA head loop over those two warps and then take the yarn back over the left-hand side warp and bring it from the back to the front through the centre. Continue this until the end of this row and then do a third row which will be the same as the first row of continuous RYA knots.

Now you want to take a length of 14 strands of 35cm lengths of the green yarn to create a row of thick tabby weave. Start by hitching on, then go over three warps and under one warp, over three warps and under one warp until the end. The last one you only need to go over two warps, then under the last warp and hitch off.
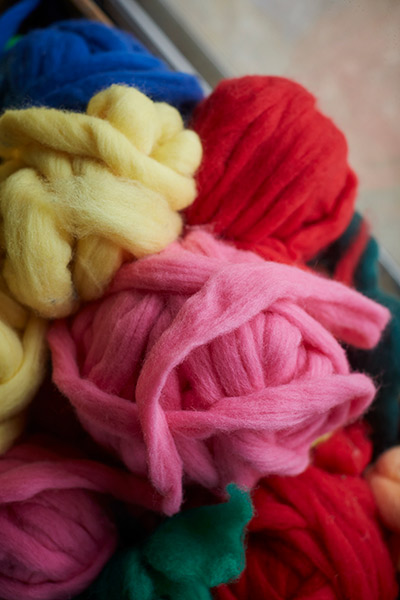
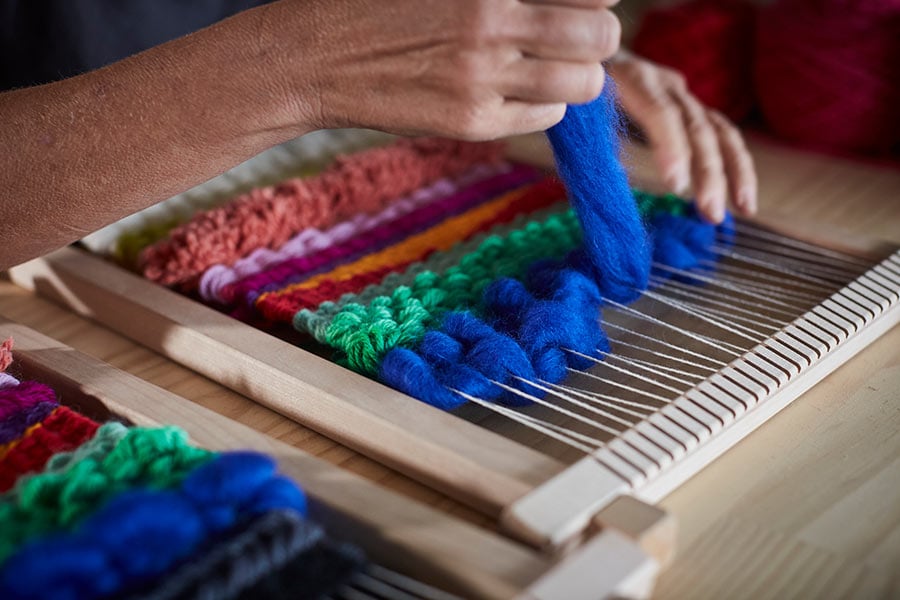
STEP 11: ROVING
Roving is a long and narrow bundle of fibre. It is produced during the process of making spun yarn from wool fleece. The main use for roving is for spinning, however we are going to use it today in our weaving to create a thick luscious textural effect. I am splitting the roving in half the thickness to ensure it doesn’t split. Begin by weaving a couple of rows with the with tabby weaving, and pull the roving out in puffs to give a volumised effect. Ensure you hitched on and off at the beginning and end.
Now you will take the indigo wool and take 2.5 metres in length with 2 strands. Weave the two strands with tabby weave under and over one warp at a time. Continue until you have run out of the wool.
Next you will weave with the Soumak knot again, using the grey wool. Each row requires 1.7 metres in length and this time we will use only four strands to make it a bit thinner than before. Follow the Soumak instructions from Step 5.
Finally, you take the black wool and weave with a single strand tabby weaving.
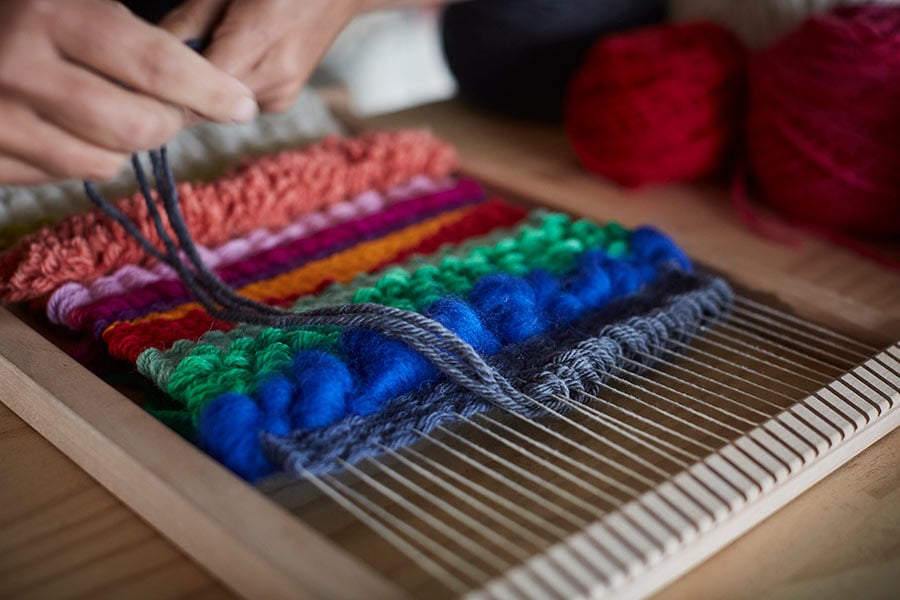
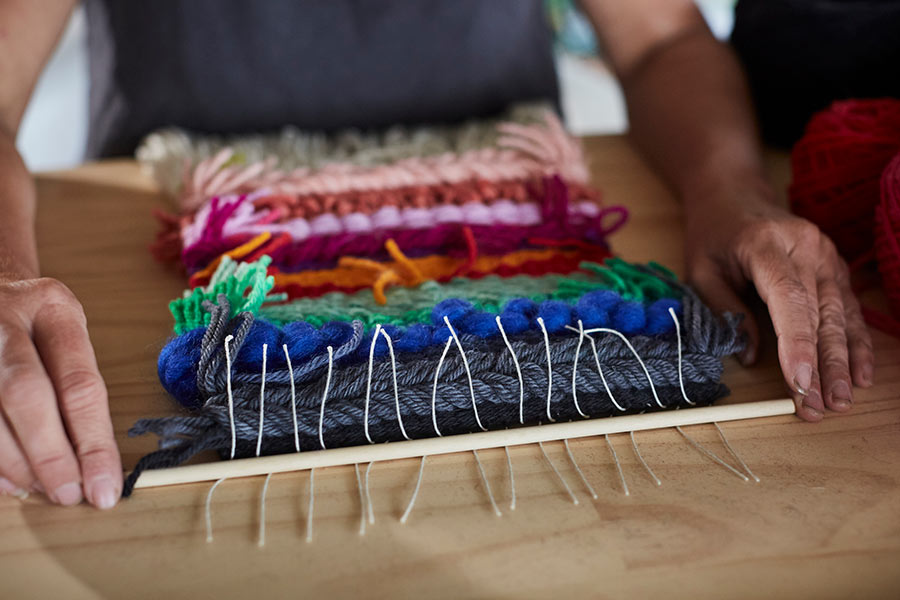
STEP 12: FINISHING YOUR WALL HANGING
Once you have completed your weave it is very important to do the final row of double half hitch knots. Ensure your weaving has been compressed down with your fingers and you have a least 5-6 cm of warp left at the top so you can tie around your rod.
For the knots, I’m taking 1.5 metres in length of black wool and doing a row of double horizontal half hitch knots as described at the beginning.
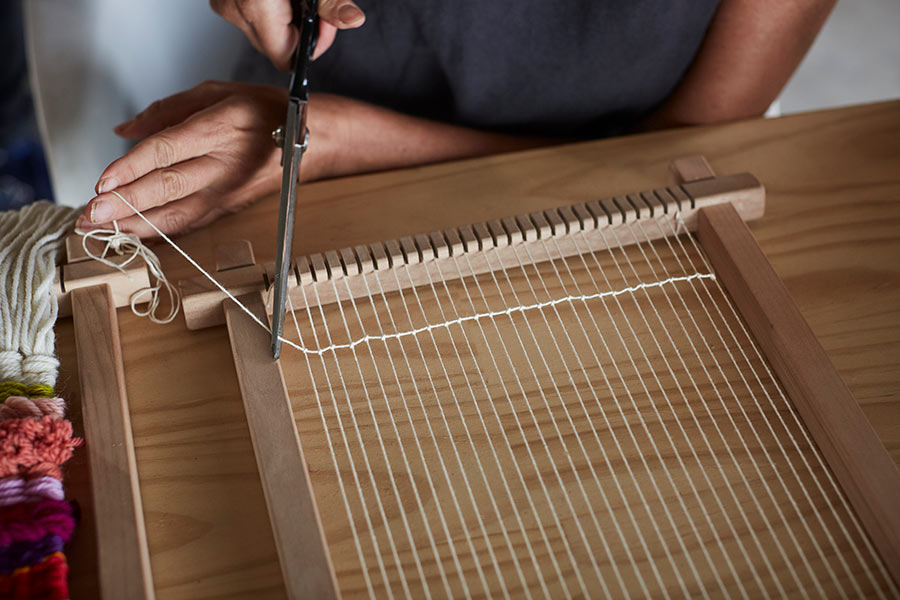
Once you have completed your row of knots you are ready to cut from the loom.
Cut the warp at the top trying to retain as much length of the warp as possible. You can then cut the bottom warp lengths from the loom.
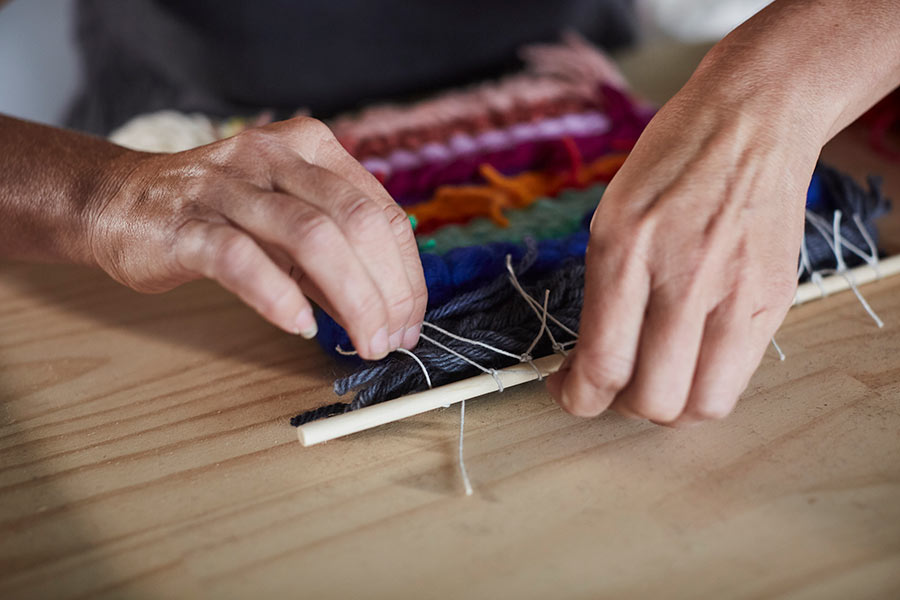
You may choose to hang your weave without attaching it to a rod, foraged stick, or length of copper or aluminium. Place your weaving upside down on a table and bring every second warp down over your weave. Please your rod in position. You now tie the adjoining warps to one another ensuring the knot is at the back of the weave.
To hang the weave cut a length of warp and do a lark’s head knot (macramé knot) in the centre of the rod and then it will hang neatly.
Congratulations on the beautiful end result and don’t forget to share on Instagram with #thedreamweavingproject
Photography: Liz Ham